Backbone offers flexible subscription plans and workspace features designed to streamline your real estate marketing workflow. Whether you're an independent realtor or part of a large agency, you can manage your workspaces, members, properties, and subscriptions in one place — while getting access to professional visual services, team collaboration tools, and AI-powered features that save time and enhance your property listings.
This article explains how to manage your workspace and your Backbone plan: switching between multiple workspaces, inviting and managing members, transferring properties, managing subscriptions, and understanding role-based access.
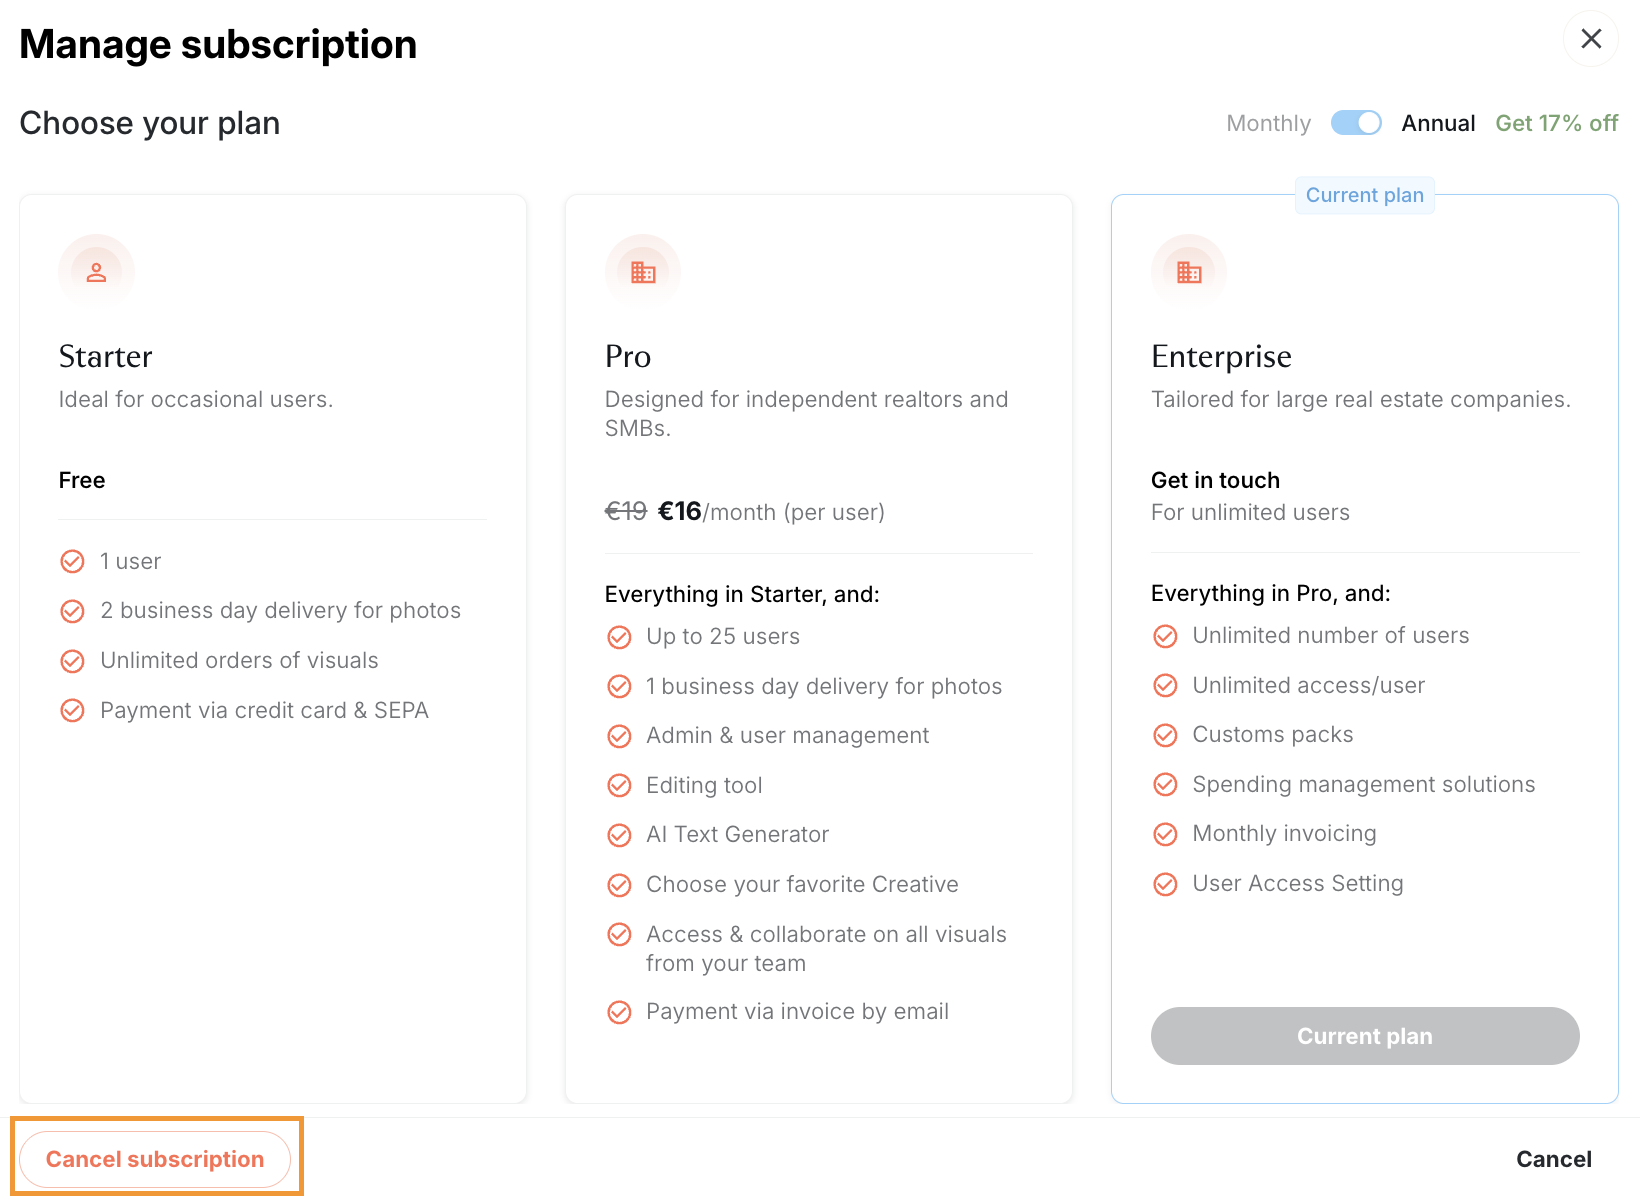
| Starter Plan - Free | Pro Plan - €16-19/month per user | Enterprise Plan - Custom pricing |
|---|---|---|
| • 1 user. • 2-business-day delivery guaranteed. • Order visuals instantly. • Upload your own visuals. • Mobile App (iOS & Android). • Price: Free forever. | • Everything in Starter, plus: • Up to 25 users. • 1 business day delivery guaranteed for photos. • Choose your photographer. • Photo & floor plan templates. • Access & collaborate on all visuals from your team. • Bulk exporting options. • AI editing. • AI text generator. • Public API access. • Payment via invoice. • Price: €19/month (monthly) or €16/month (annual - save 17%). • Includes: 1-month free trial. | • Everything in Pro, plus: • Custom packs tailored to your requirements. • User access settings and permissions. • Unlimited users. • Monthly consolidated invoice for all orders. • Dedicated account management. • Price: Contact sales team for tailored quote. • Sales Team: bkbn.com/contact. |
🧭 Step-by-Step Guide
🏢 Workspace Management
A workspace is where your properties, team members, and visuals all live together on the Backbone platform. It's tied to your subscription plan, and from it you can manage who has access, place orders, and view all the visuals created for your properties.
- A workspace will automatically be created once you set up your Backbone account.
- A user can belong to multiple workspaces at once (personal and/or business).
Creating a new workspace
- Click on the arrow next to your workspace’s name.
- Click on “Create new workspace”.

- Enter a name for your new workspace and confirm.
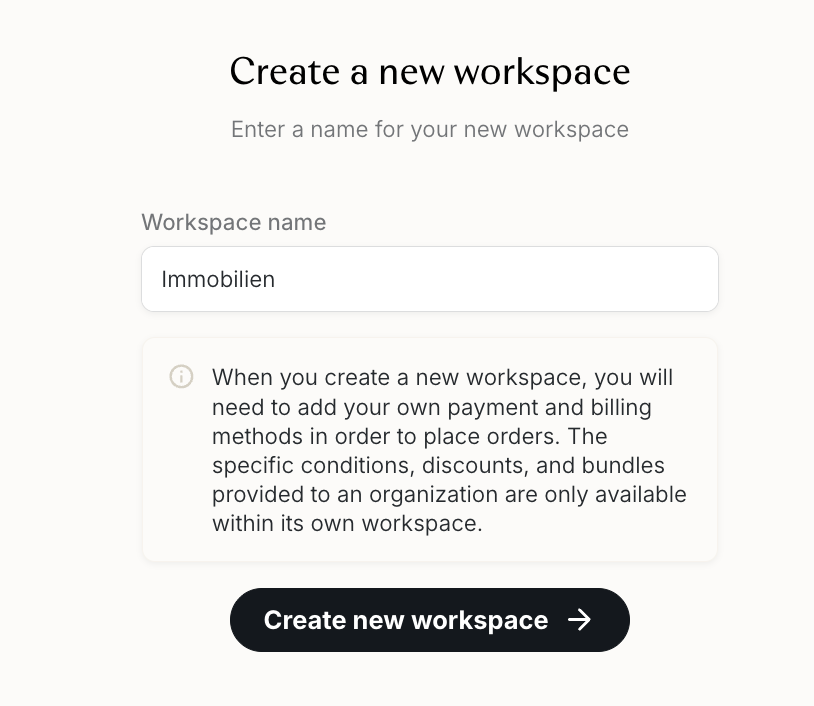
- Select which plan you’d like to subscribe to (you’ll be on the free plan automatically).
Switching workspaces
- Click on the arrow next to your workspace’s name.

- Click on the workspace you want to work from.
Changing a workspace name
- Navigate to the drop-down menu on the homepage.
- Go to “Settings”.
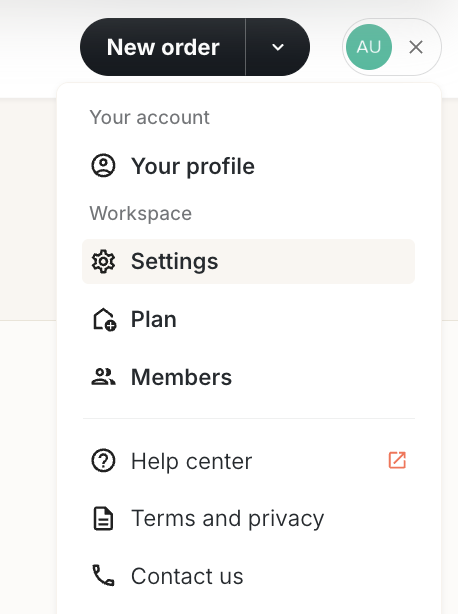
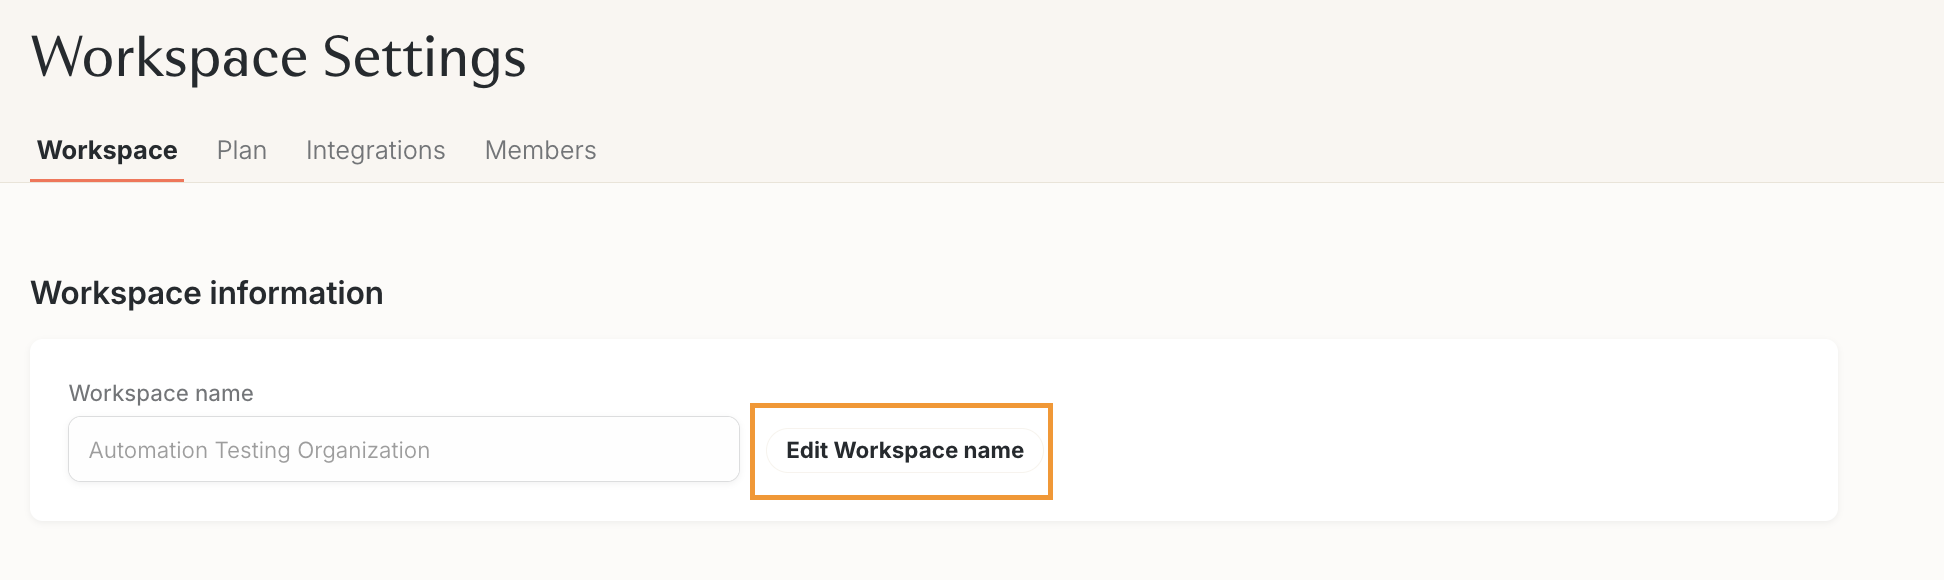
- In Workspace information, click on “Edit Workspace name”.
Transferring properties between workspaces
- Go to your Properties Dashboard.
- Select the property you want to transfer.
- Click on “Transfer”.
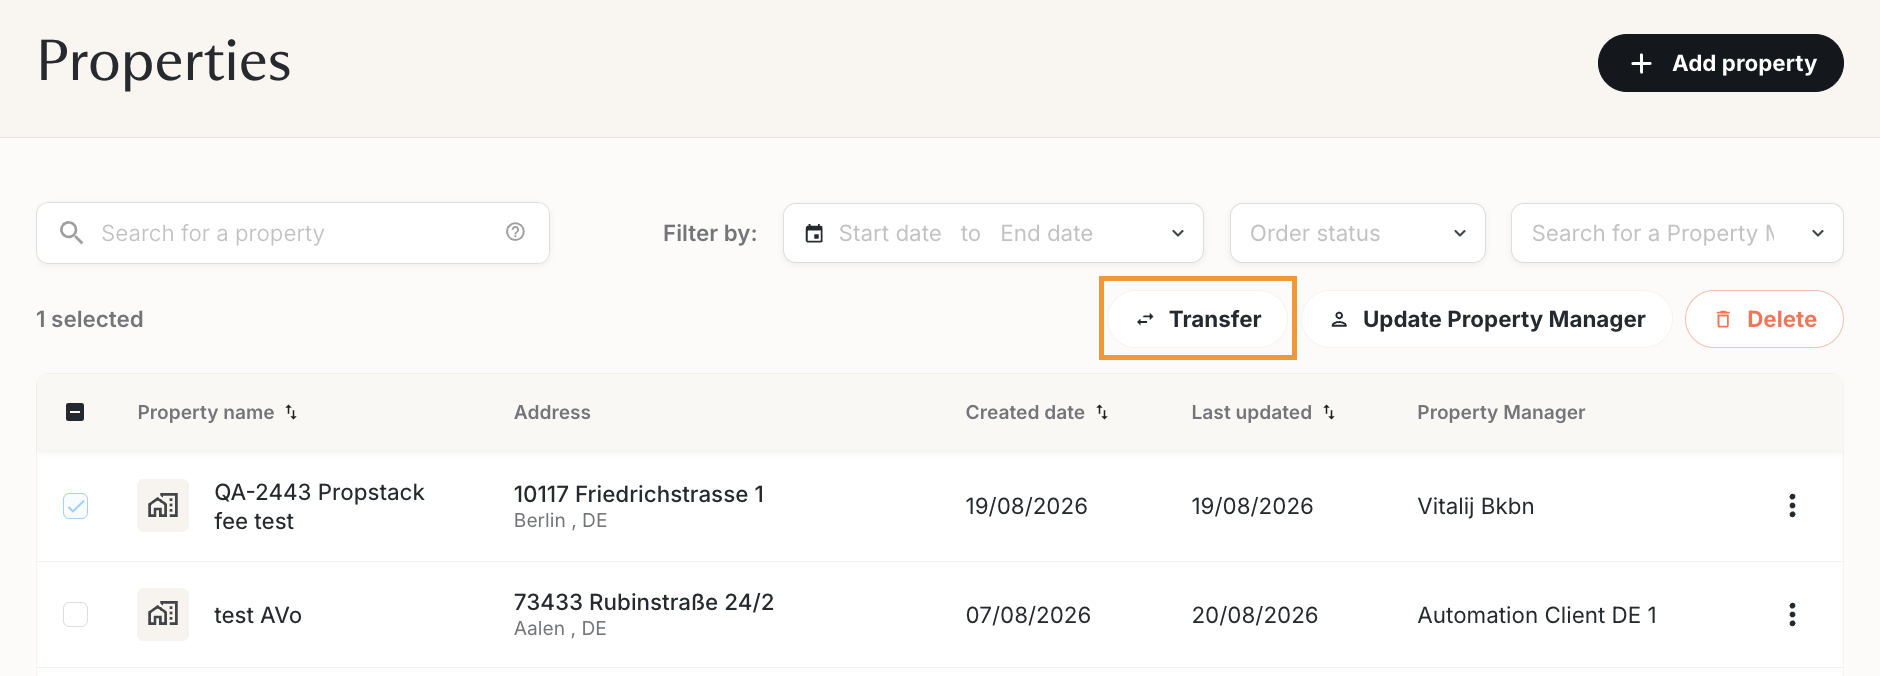
- Select the target workspace.
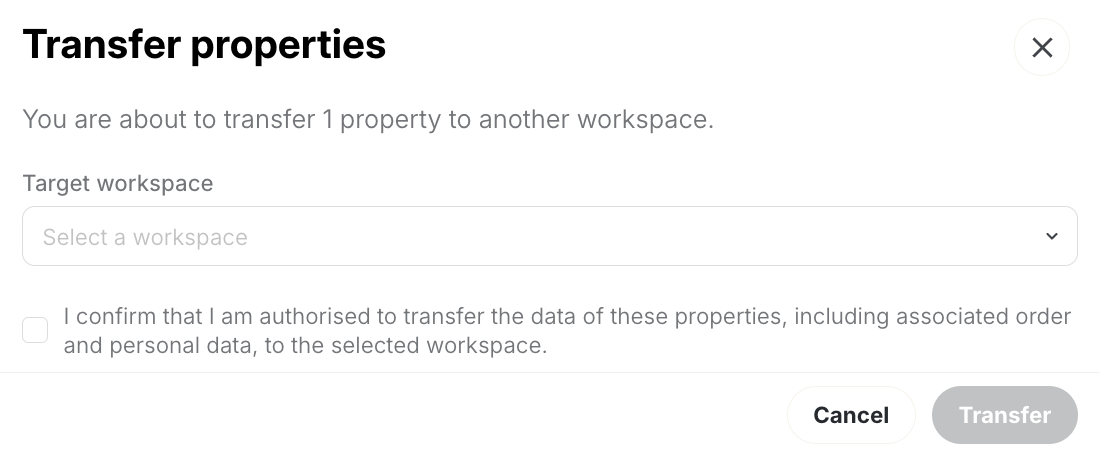
- Tick the confirmation box and click on “Transfer”.
Deleting a workspace
- Navigate to the drop-down menu on the homepage.
- Go to “Settings”.
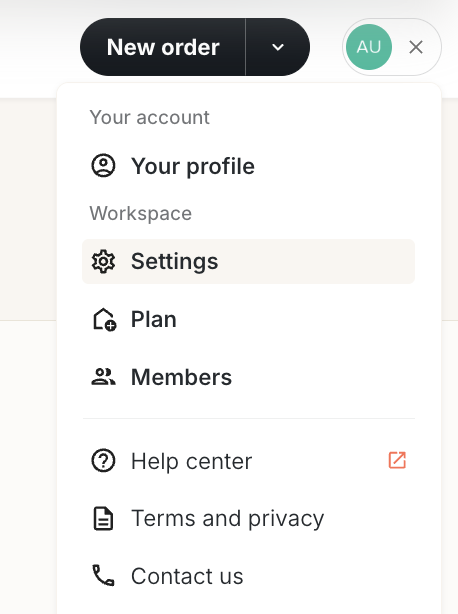
- Go to the “Danger Zone” section.
- Click on “Delete workspace”.

- Enter the workspace name you want to delete and confirm.
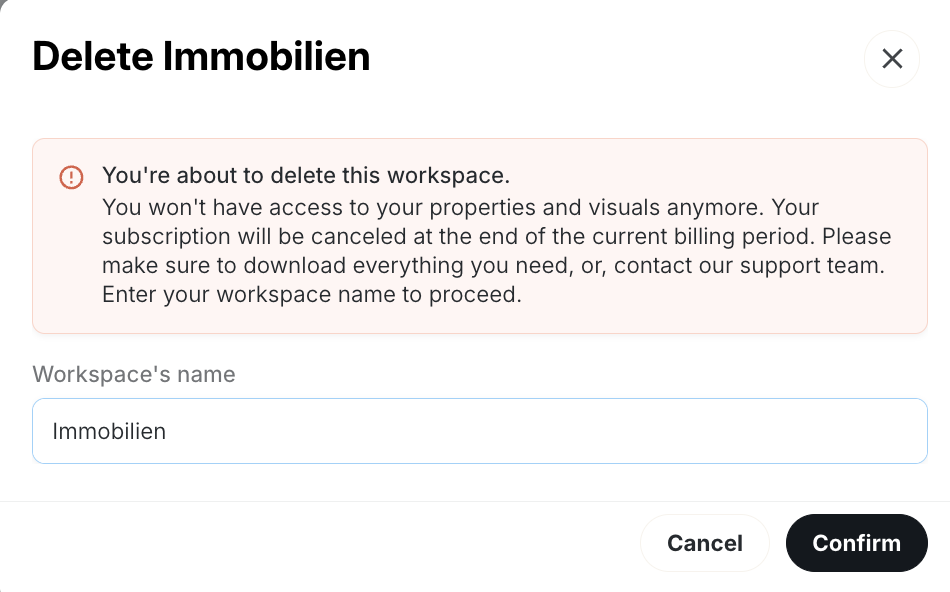
- Your workspace will be deleted at the end of your subscription plan.
🚀 How to Activate Your Subscription
Step 1: Choose Your Plan
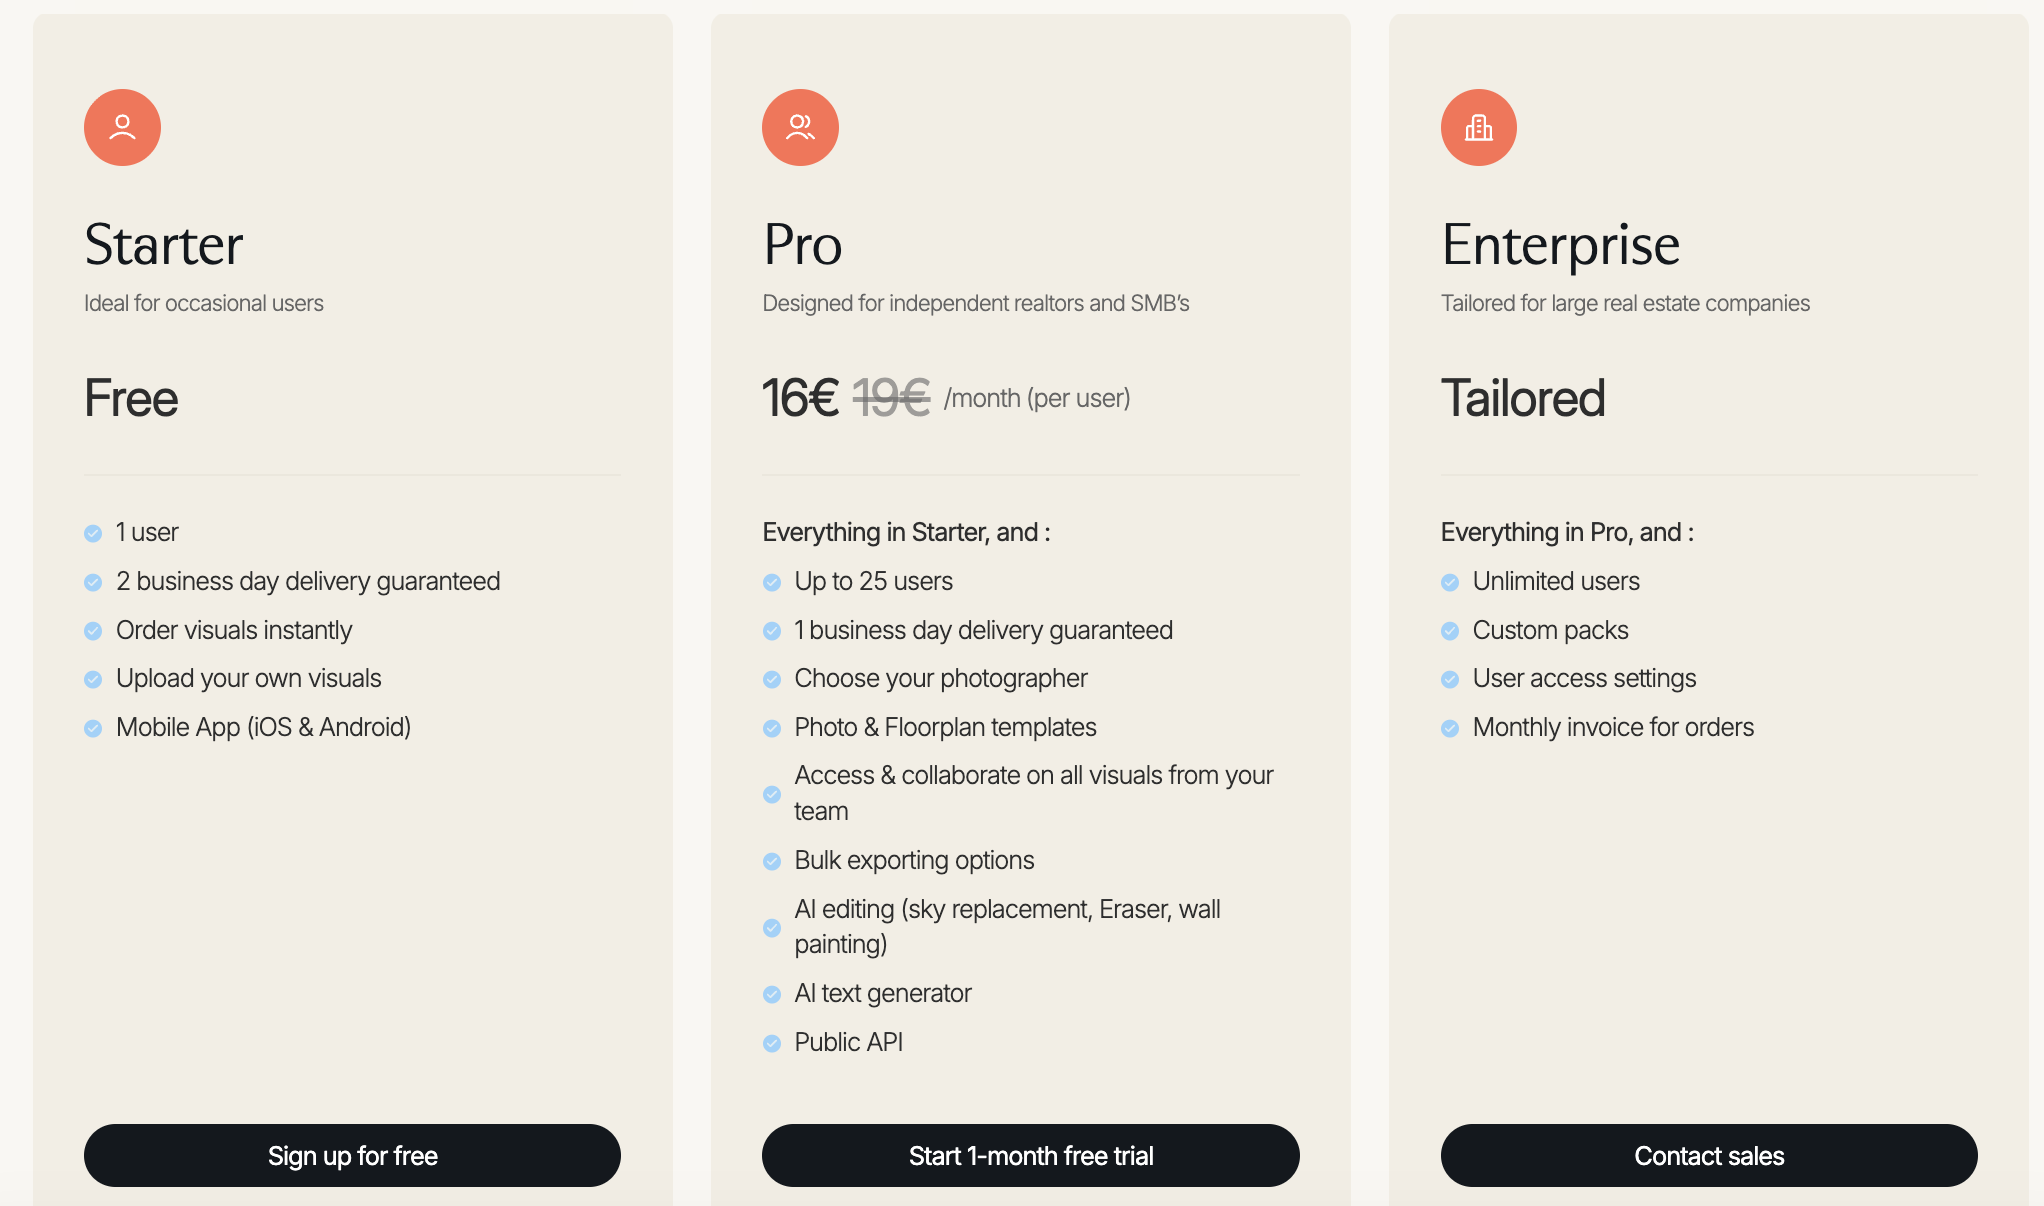
Step 2: Start Your Free Trial (Pro Plan)
- Click "Start 1-month free trial" on the Pro plan.
- You'll be directed to the signup/login page.
- Create your account or log in.
Step 3: Enter Payment Information
- Enter your credit card information to activate the trial.
- You won't be charged during the 30-day trial period.
- Payment only occurs after the trial ends.
Step 4: Set Up Your Account
- Complete your company profile.
- Add team members (up to 25 for Pro Plan).
- Set up preferences (templates, favorite photographers).
Step 5: Start Using Backbone
You now have full access to all Pro features for 30 days.
👥 Managing Team Members (Pro & Enterprise)
Adding Team Members:
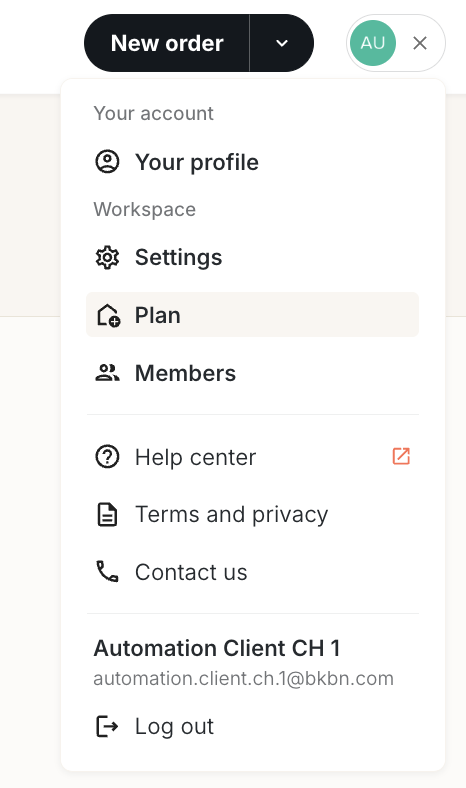
- Navigate to the drop-down menu on the homepage and select "Plan" or “Members”.
- Go to the members section.
- Click "Invite member".

- Enter the individual's email address.
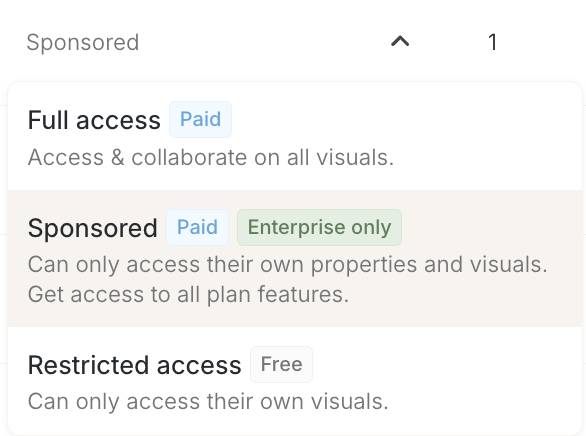
- Choose an access level:
- Full access: The user can collaborate with the team and access all visuals.
- Sponsored (Enterprise only): The user can only access their own visuals and properties, as well as the plan features.
- Restricted access: The user only has access to their own visuals.
Good to know: Restricted users can be added for free to any plan. This means you can invite your whole team to the same workspace and promote members to place an order when needed — without constraints on adding them.
- To validate, click on "Invite member".
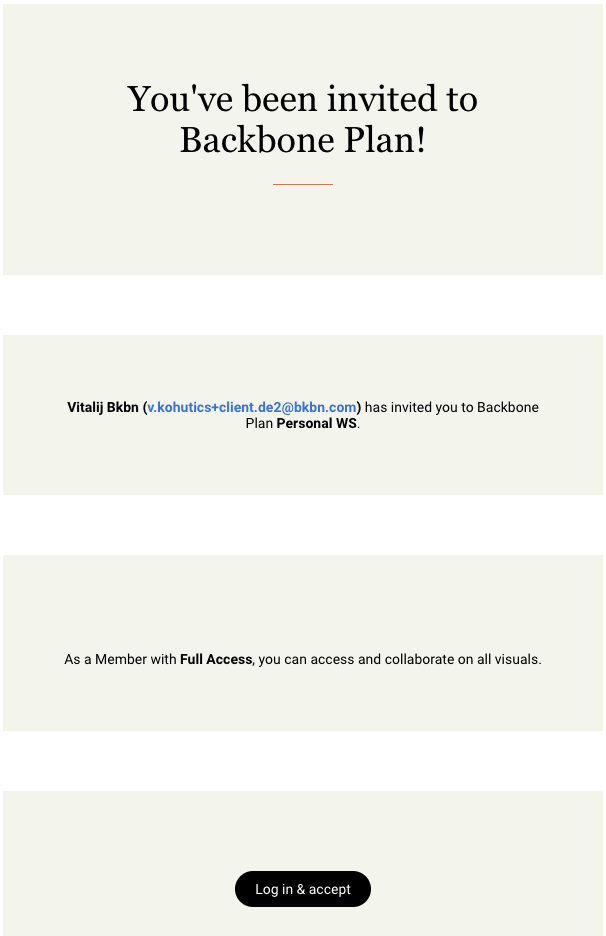
The invited user will receive an email invitation to set up their password and activate their account. You'll receive a confirmation email about the member addition.
Removing Team Members:
- Navigate to "Plan" via the drop-down menu.
- Go to the members section.
- Find the team member you are looking for, click the three dots, and "Remove & transfer visuals".

- Complete the verification form (our team will process this request for security).
⚠️ Important: When you transfer images to another account, the original account is automatically deleted and cannot be restored.
Changing Members’ Permissions:
- Admin vs member: You can adjust a member's status by granting them admin access in the three dots. Admin has full privileges to manage all members and the entire plan.

- Seat type:
- Full access: The user can collaborate with the team and access all visuals.
- Sponsored (Enterprise only): The user can only access their own visuals and properties, as well as the plan features.
- Restricted access: The user only has access to their own visuals.
- Can place order: Move the toggle to the right to allow members to place orders themselves. Move it to the left to prevent members from placing orders.

⭐ Key Features with Your Subscription (Pro & Enterprise)
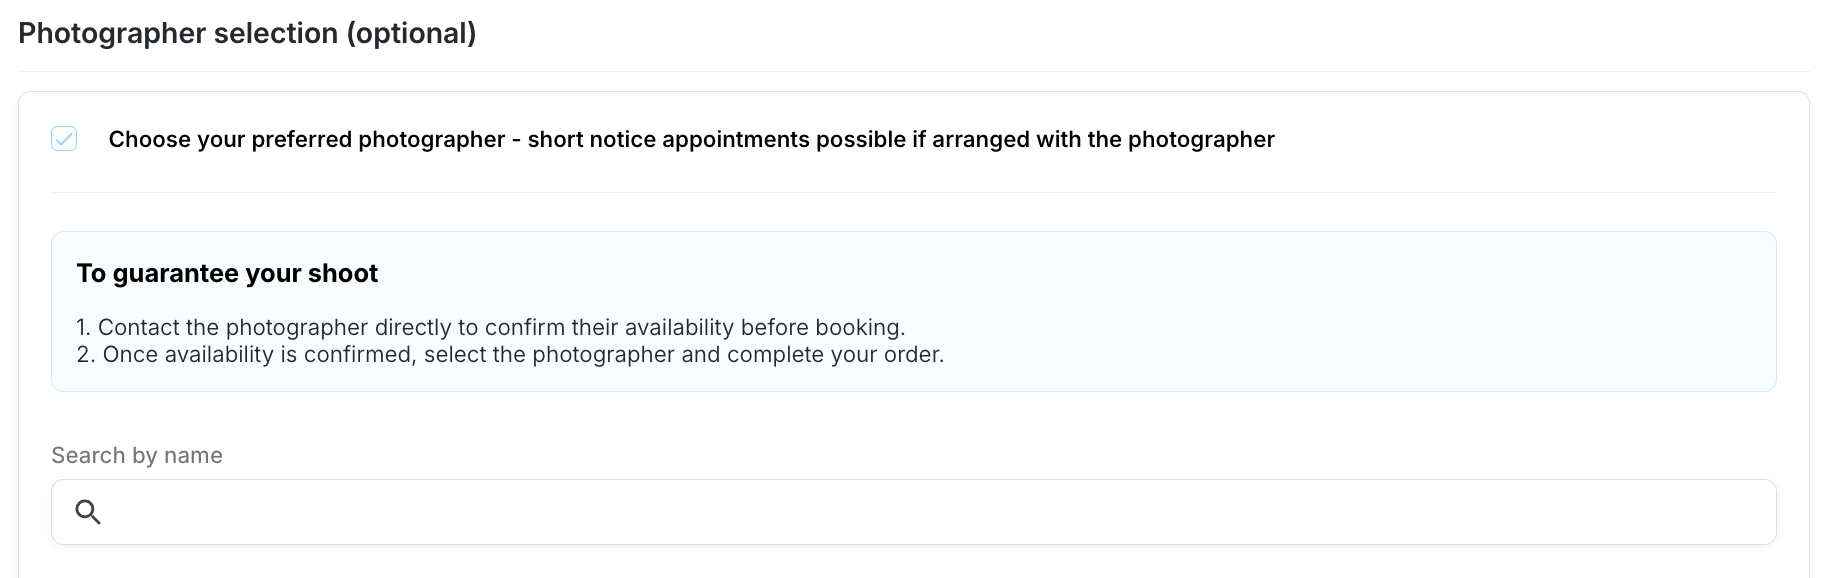
1. Choose Your Favorite Photographer
During the ordering process, you can select a photographer you've previously worked with. The system displays photographers who:
- You or team members have collaborated with before.
- Can handle all the products you've selected.
⚠️ Note:
- The system is not synced with photographers' schedules, so contact them directly to confirm their availability before booking.
- If the photographer is over 10 km from your shooting site, you'll cover travel expenses.
- If the selected photographer is not available, Backbone will assign another photographer or propose a new shoot date.
2. One Business-Day Photo Delivery
Receive your photo visuals in just 24 business hours. Please note: this 1-business-day delivery applies exclusively to photo products, not to other product types such as floor plans, virtual tours, or videos. This feature is automatically integrated into your plan—no extra steps required.
3. Payment via Invoice
Select "invoice by email" as your payment method in addition to card and SEPA payments at no extra cost.
4. Bulk Exporting
Select multiple visuals at once to save time with mass edits. You can add your logo, resize images, or export in your desired format all at once. To access these tools:
- Select your visuals in the gallery.
- Click on "Exporting options".

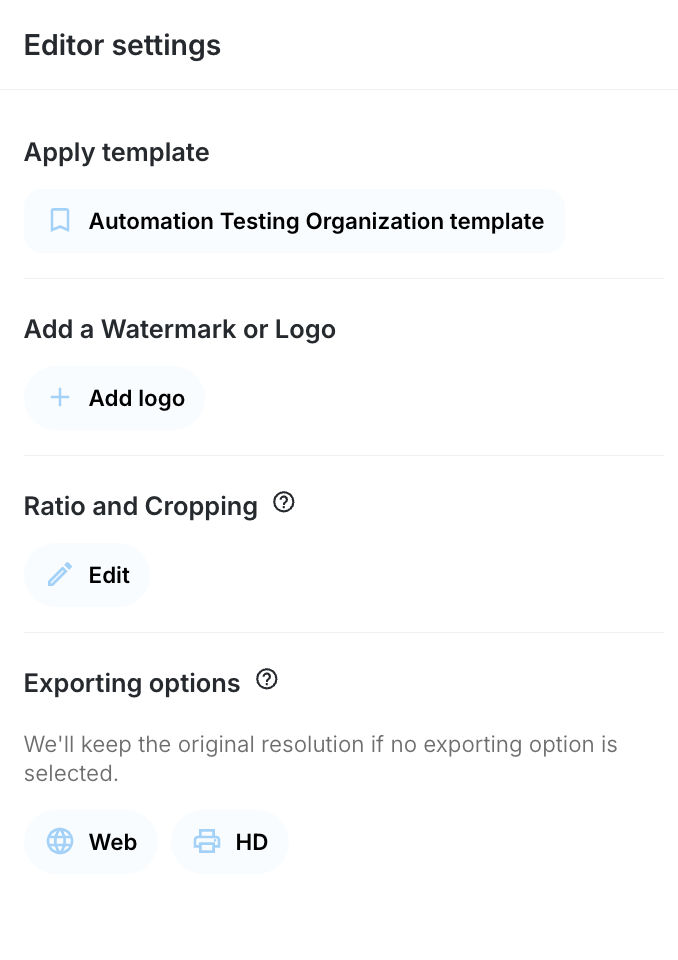
- Adjust the editor settings as needed. Here are the available options:
- Apply Template: Any template set by your admin to unify the company visuals. Simply click on the template button set (or create a new template - admin only).
- Add Watermark or Logo: Customize the look, opacity, and position of your logo.
- Ratio and Cropping:
- Use preset ratios (4:3, 16:9, 1:1, 4:5, 3:6).
- Modify visual resolution (e.g., 300 ppi for prints, 72 ppi for web).
- Exporting Options:
Choose between WEB and HD. We'll keep the original resolution if no exporting option is selected.
5. AI-Powered Features
- AI Text Generator: Create enhanced property descriptions
- Learn more: AI Text Generator Guide
- Photo Studio Tools: Virtually stage empty spaces and replace furniture with new styles, remove undesired objects, and adjust your photo.
- Learn more: Photo Studio Guide
6. Team Collaboration Features
Team-wide Visual Access:
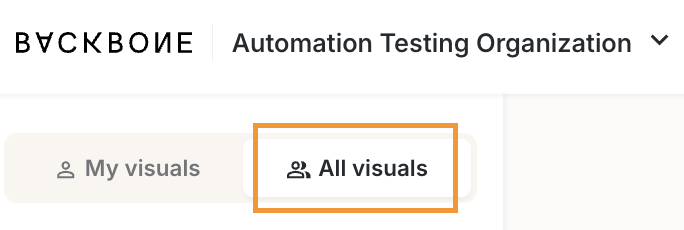
- When enabled, all admins and members can access, search, download, edit, and cancel orders created by other team members for all company visuals.
- Use the control panel to filter by order status and users, or search by order number or property name.

- Download colleagues’ images when they're unavailable.
Share Visuals:
- Click the "Copy link" button at the top of your gallery.
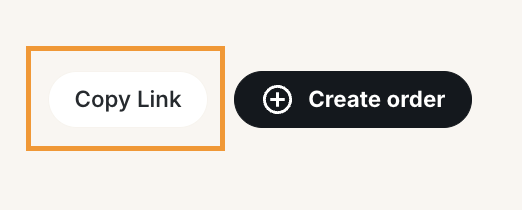
- Share order links with team members.
💳 Managing Your Subscription & Billing Address
How Billing Works:
- Access subscription details via the drop-down menu at the top right > "Plan" tab.
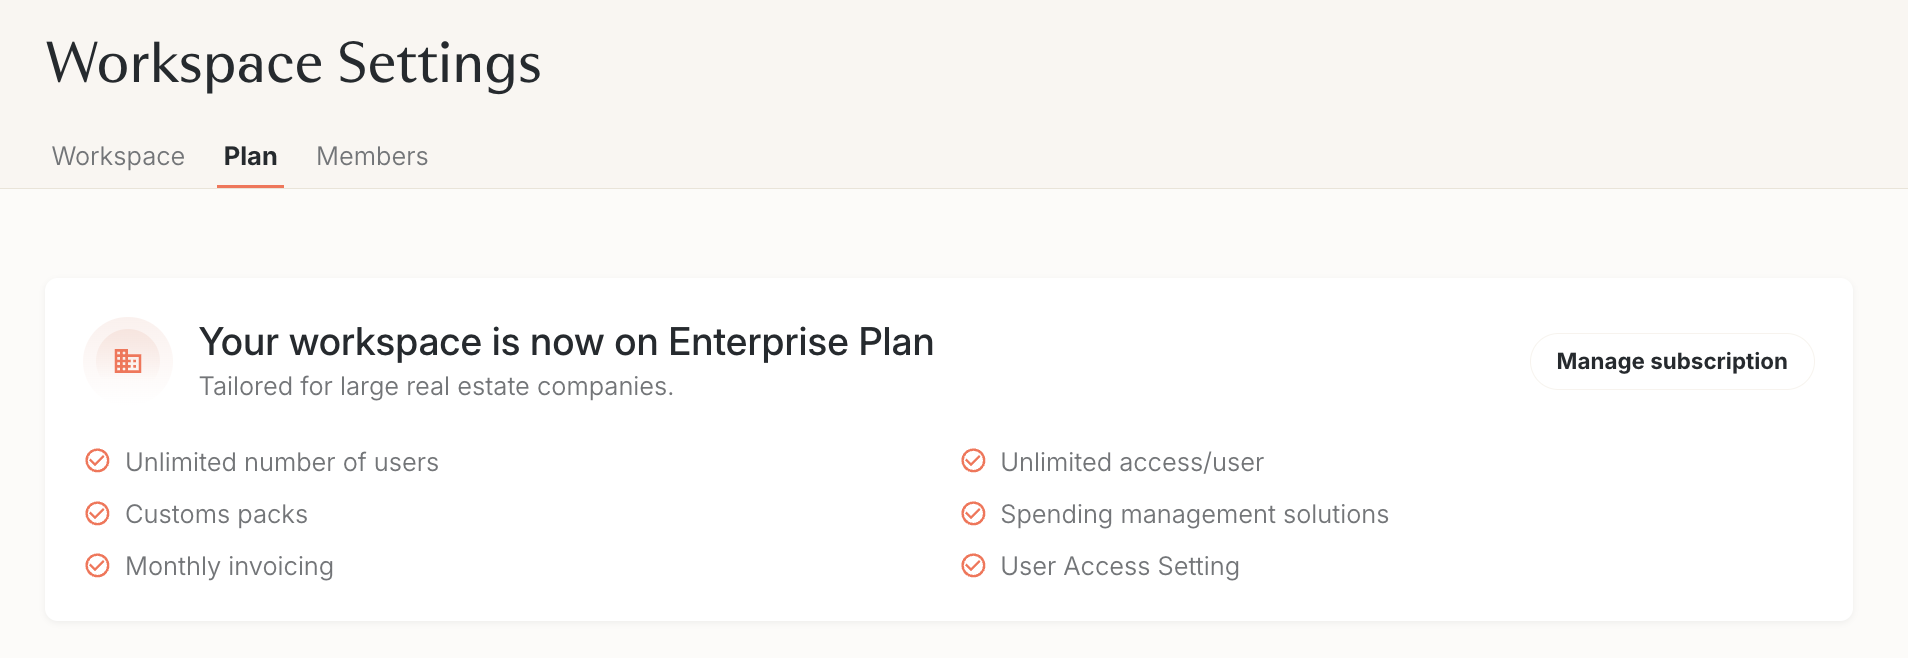
- Billing begins 30 days after your sign-up date (after the trial period) for Pro Plan.
- Billing frequency:
- Annual subscriptions: Billed yearly
- Monthly subscriptions: Billed every 30 days
- Admin can update billing information (including VAT number) under "Profile" > "Manage my invoice addresses".

For Custom Contracts:
If you negotiated a specific contract with your Account Executive at Backbone, contact them directly for payment information.
❌ How to Cancel Your Subscription (Pro & Enterprise)
Cancelling your subscription:
- Log in to your Backbone account here.
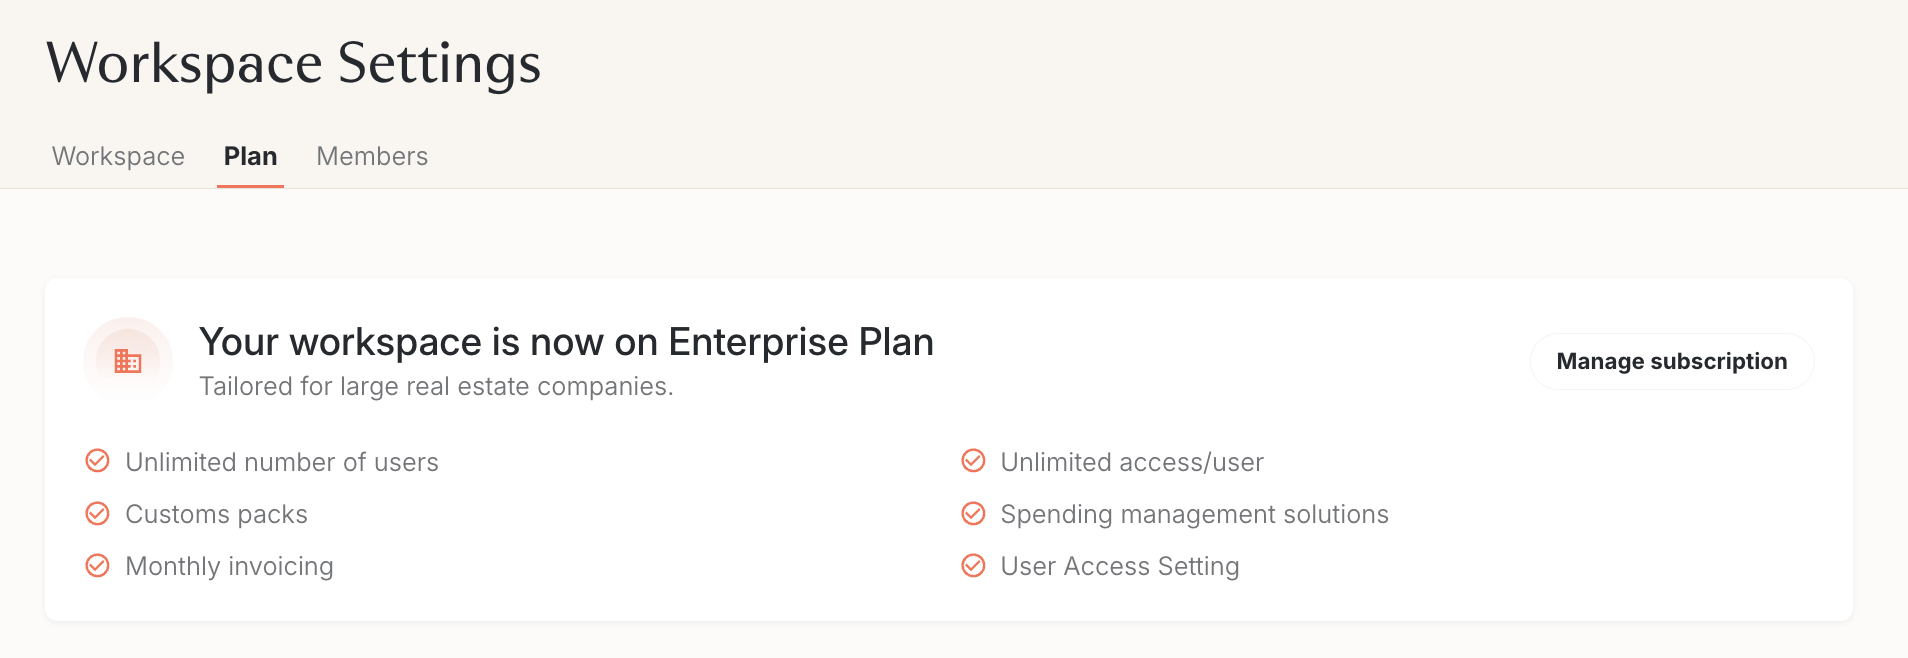
- Navigate to "Plan" via the drop-down menu.
- Click on “Manage subscription”.
- Click "Cancel Subscription".
- Complete the verification form to confirm cancellation.
Important Information:
A cancellation is always effective at the next renewal date (monthly or yearly, depending on plan):
- If you cancel before the renewal date:
- Cancellation applies at the end of the current billing period.
- If payment was already charged, our finance team will issue a 100% reimbursement.
- If you cancel after the renewal date:
- Cancellation applies at the end of the following billing cycle.
- You keep access for the full paid cycle, but no reimbursement is possible once the renewal has been processed.
Additional Details:
- No cancellation fees.
- Subscription remains active until the end of your current billing period.
- You'll continue to have features access until your paid period ends.
- After cancellation, your account reverts to the free Starter plan.
- All your data and projects remain safe and accessible.
❓ FAQ
Q: What happens after my free trial ends? A: Your payment method will be charged automatically unless you cancel before the trial period ends.
Q: Can I upgrade or downgrade my plan? A: Yes, you can change your plan at any time. Please contact your account manager at Backbone or subscribe to or cancel a plan as described in the article above.
Q: What's the difference between an admin and a member? A: Admins have full privileges to manage all team members, billing, and the entire plan. Members have access to features based on their assigned permissions.
Q: Are there any limits on the number of orders I can place? A: No, there are no limits on orders. You can place as many orders as needed with any subscription.
Q: What happens to my visuals if I downgrade to the Starter plan? A: All your data and projects remain safe and accessible. However, you'll lose access to Pro/Enterprise features like 1-day delivery, team collaboration, and AI tools.
Q: Can I add more users than my plan allows? A: Pro Plan supports up to 25 users. If you need more, consider upgrading to the Enterprise Plan, which offers unlimited users.
Q: How does the 1-business-day delivery work? A: For Pro and Enterprise plans, photo products are delivered within 24 business hours (Monday-Friday, excluding holidays). This applies to photos only, not all product types.
Q: Can I get a refund? A: Please contact your account manager or our support team to discuss your specific situation and refund options.